Newsletter On-Demand Webinar
Create a Newsletter
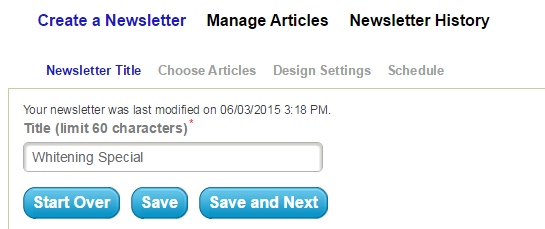
The Create a Newsletter section has four tabs: Newsletter Title, Choose Articles, Design Settings, and Schedule. You will progress through each of these pages by clicking Save and Next. Once you reach Schedule, you will actually send out your Newsletter.
If you don’t have time to complete your Newsletter in one sitting, you can save it and come back to it later. Be aware, though, that incomplete Newsletters are not saved forever. If you login session expires, you may lose your progress, and have to start over.
To start your Newsletter, enter the Title and click Save.
Choose Articles
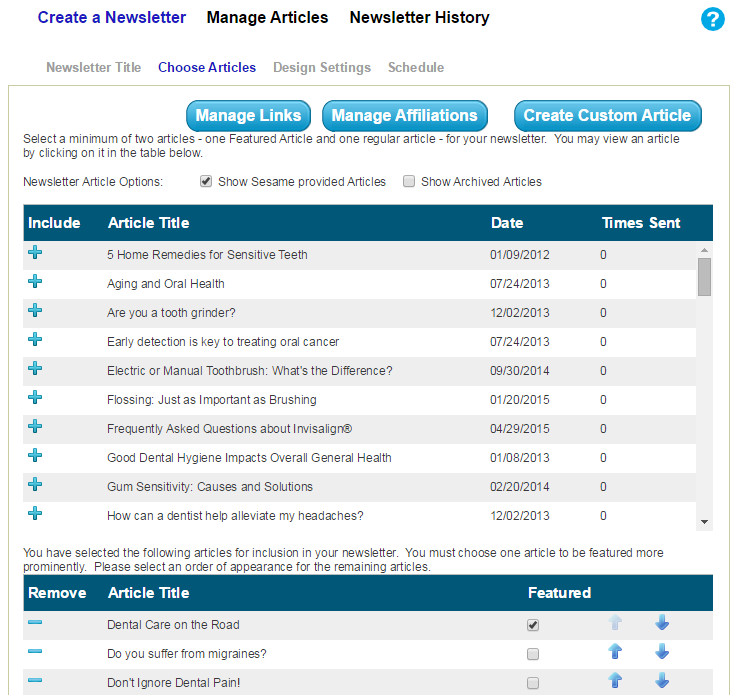
On this page, you can choose the articles you will use in your Newsletter. The list at the top of the page includes all available articles. Using the check boxes provided, you can filter this list by hiding Sesame-provided articles or articles that have been archived. Clicking the top bar allows you to sort them by Title, Date created, or the number of Times Sent.
To add an article to your Newsletter, click the blue “ + ” button in the Include column. As you add articles, they will appear in the bottom list. Using this list, you can change the order the articles appear in the Newsletter with the arrows on the right. You can also choose one Featured Article, which will appear in a column on the right-hand side of the Newsletter.
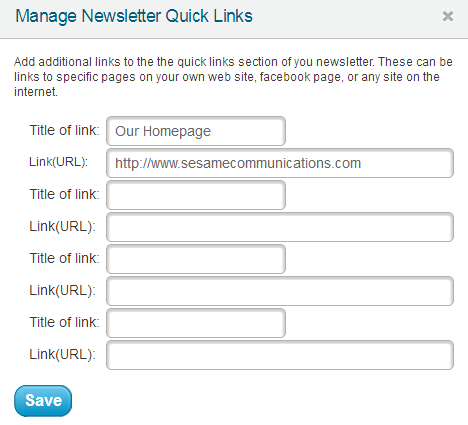
Manage Links
If you click the blue Manage Links button, you will have the option to add up to four links in your Newsletter. You might use these to link to your social media accounts, or to resources your patients might find helpful or interesting. A link to your website will be added automatically.
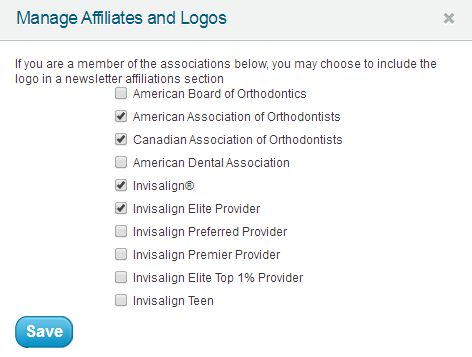
Manage Affiliations
Clicking the blue Manage Affiliations button will bring up a list of logos that can be added to your Newsletter automatically, complete with links to their respective websites.
Create Custom Article
Clicking the Create Custom Article button will allow you to create your own article that can be added to the current Newsletter or saved for later use. This is covered in the Managing Articles page.
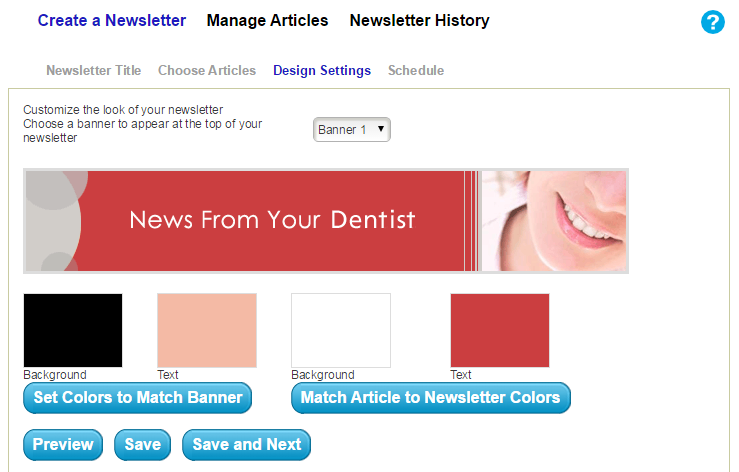
Design Settings
On the Design Settings page, you can use the drop-down menu to choose which banner will be used for your Newsletter. You can choose from the pre-made banners available, or use your Custom Banner, which will be the default option.
You can also make changes to the Newsletter colors using the boxes below the banner: the left two boxes change the text and background colors of the header and footer (where the Newsletter title and your office address are located), and the right set of boxes changes the color of the article titles.
Alternatively, you can use the Set Colors to Match Banner button to use colors complimentary to your banner, then match your articles to these colors using the Match Article to Newsletter Colors. The Preview button allows you to view your changes before saving.
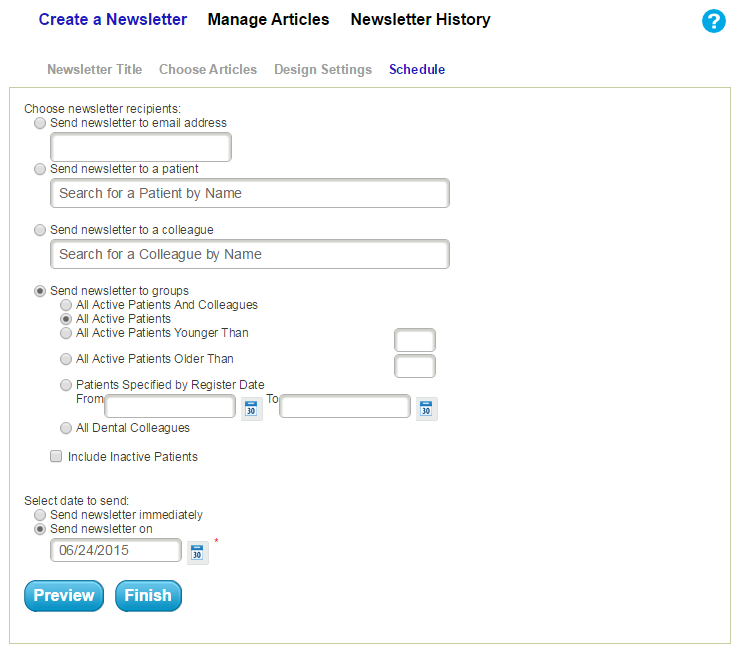
Schedule
Using the Schedule page, you can choose recipients for your Newsletter, and schedule when it will be sent. When selecting recipients, you have a few options available:
- Send Newsletter to Email Address - You can enter a specific email address and your Newsletter will only go to this one address
- Send Newsletter to a Patient - You can enter a patient’s name and, if the person has an email address in Sesame, it will be sent there.
- Send Newsletter to a Colleague - You can enter the name of a colleague and if he or she is entered in Sesame and has an email address, it will be sent there.
- Send Newsletter to Groups - There are several preset group options, such as send to “All Active Patients.” When specifying patients by “Register Date,” note that this is the date that the patient had an email address added to Sesame. You can use the “Include Inactive Patients” check box to send your Newsletter to inactive patients as well.
You will be able to see the Newsletter on the Newsletter History page under the Scheduled tab. If you decide you don’t want to send it, you can delete it from there.
When you have completed your Newsletter, be sure to click the Finish button.
 Looking for more information? Check out these Related Pages!
Contact our Member Services team at 866-537-8272, Monday - Friday 6 AM to 4 PM Pacific Time.