From the Custom page you can create and send custom emails to all of your patients, selected groups of patients, or even individual patients. You can also schedule when Custom emails are sent, so you can create them in advance and have them sent on a specific date.
Creating a Custom email
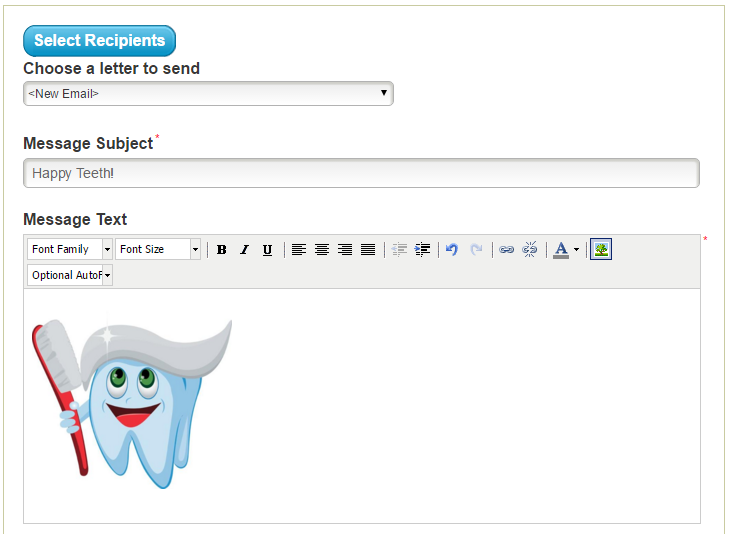
If you are not already on the correct page, click the Edit Custom Emails tab. The first option you will see on this page is the Select Recipients button - see below for more information on selecting recipients. Below this is a drop-down menu from which you can select any previously saved Custom emails. If you want to create a new email, simply disregard this drop-down menu and proceed to the Message Subject field.
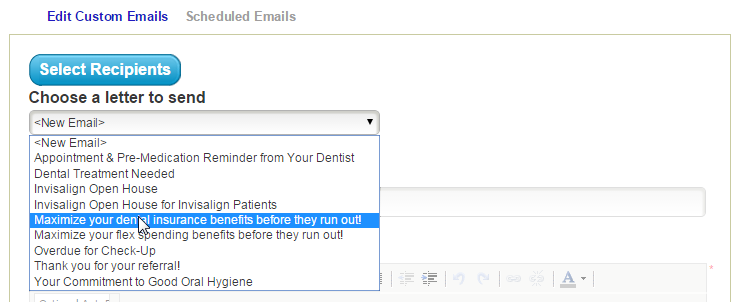
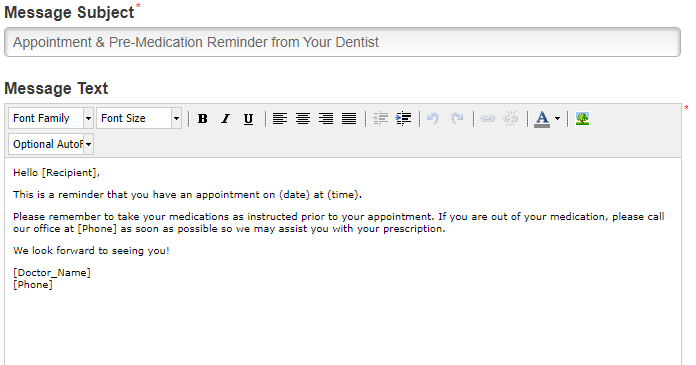
Like the automated email messages, the Message Subject is a required field for Custom emails. If you choose to save this email so that you can send it again at a later date, the Message Subject will appear in the “Choose a letter to send” drop-down menu.
Below the subject is your Message Text field. This is where you enter the content of your email. If you are creating a new email, this box will be empty; simply click inside the box and start typing to create your Message Text. If you are sending a previously saved email, you should see that text in this field. You can edit or update the text, or send it as it appears.
Using the toolbar, you can change the font family, size, or color; and adjust the format of the text. You can also use the “Optional AutoFills” drop-down menu to select from the available AutoFill options.
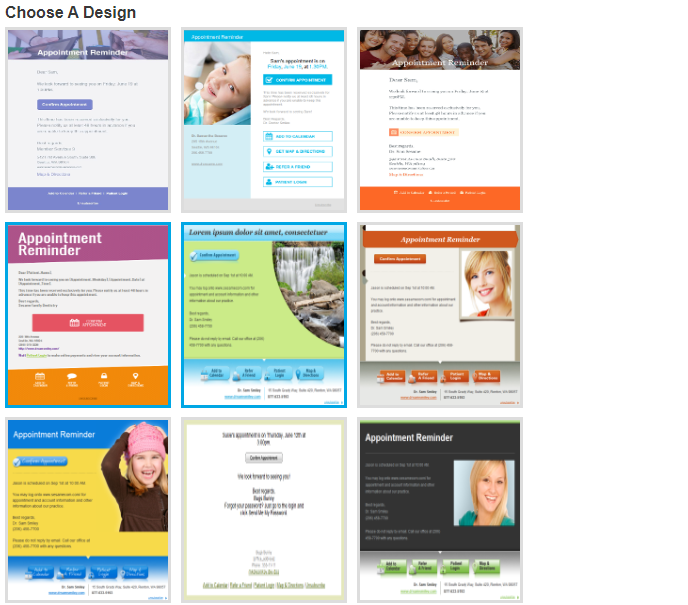
After you have updated the text of the email to your liking, you can opt to choose a design for the message. There are several themes available from which you can choose, including one that has your office banner. Only the last two will contain your custom banner and logo. Click on the design you desire and in order to apply it to your message.
The next option on the page is for the links that will appear at the bottom of the email message. You can choose to include links that allow patients to add their appointment to their calendar, provide them with a map and directions to your office, refer a friend to your practice, or log in to their Patient Pages.

If you would like to attach a file to your email, click on the Choose File button and browse to the file you wish to attach. Note that there is a 5MB size limit on attachments and only the following extensions are allowed (.avi, .bmp, .doc, .docx, .gif, .jpeg, .jpg, .mov, .mpeg, .mpg, .pdf, .png, .ppt, .pptx, .pub, .rtf, .sig, .tif, .tiff, .txt, .wmv, .xls, .xlsx). Once you have selected the desired file, click on the Attach button to save it to your Custom email.

Once the file has been attached, you will see the name of the file appear in large, bold text above the Attach button. If you wish to remove the file, simply click on the Detach button and the file will be removed from your email.

After you have completed your email, the last option allows you to either send the email immediately, or schedule to send the email at a future date and time. By default, your Custom email is set to send immediately; clearing the check mark from the box will enable the field where you can enter the date you wish to send the email.
It is possible that your email will not send exactly at the chosen time, depending on the current activity of the system.

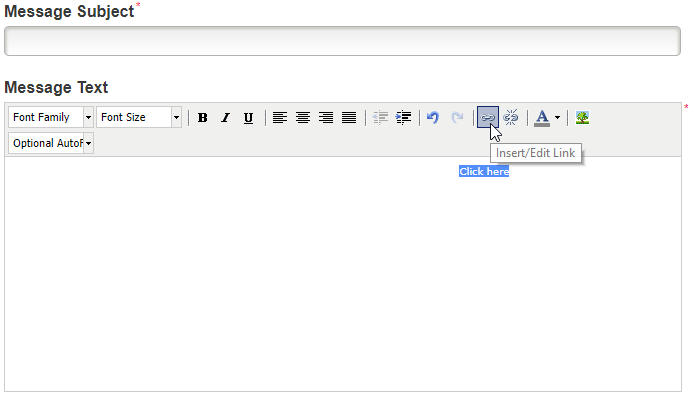
Adding a Hyperlink
You can add a hyperlink for patients to click on in Custom emails or any of the email reminder templates in Sesame. To do this, you first type out what you want the link to say (“Click here” or “Visit our Facebook page”, for example). Once it’s typed out, highlight the portion you want to be clickable with your mouse. You will then be able to click the “Insert/Edit Link” button on the message toolbar.
Paste the link in the “Link URL” field, change the Target to "Open in New Window (_blank)" and then click “Insert.”
Once you have completed your email, you can use the buttons at the bottom of the page to preview the email, send it, or save it for future use. After you click the Save button, your email will appear in the Scheduled Emails tab. If your email has not been sent, you can click on the Edit button to make changes if necessary. Click the Send button again to schedule the email to be sent after your updates are complete.
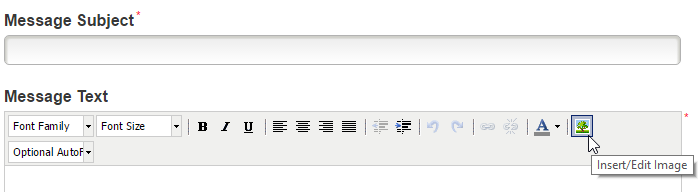
Adding an image to the body of your Custom email
If you have an image that you would like to place in the body of your Custom email instead of attaching, simply click the "Insert/Edit Image” button.
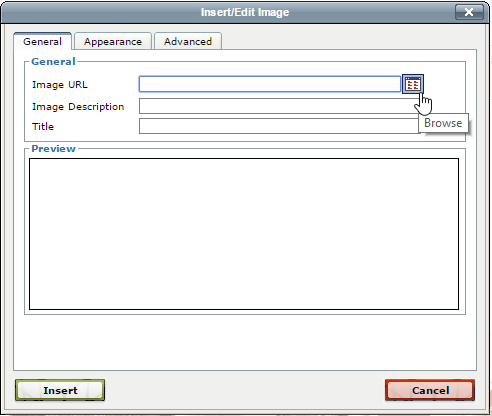
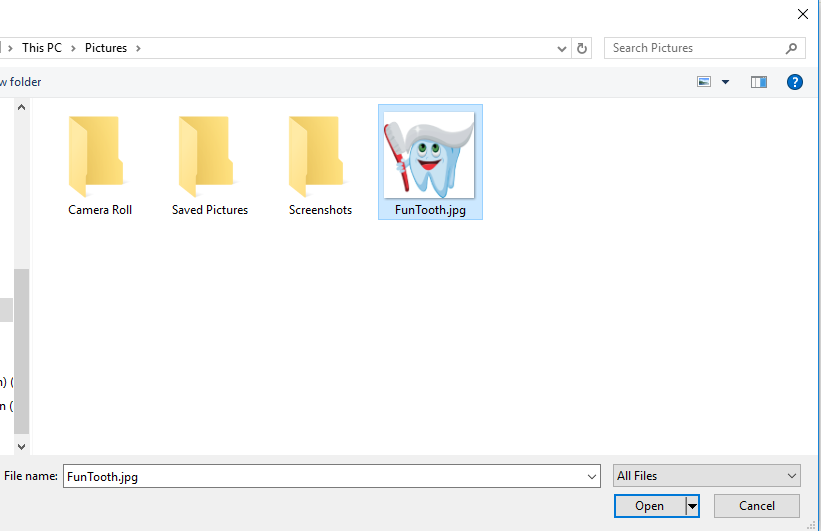
In the dialog box that appears, under the General tab, you will find the “Browse” button. Click this button to begin the process of uploading an image file from your computer.
Images must be under 5MB in size, and in one of the following formats: jpg, png, gif. Images wider than 580 pixels may be automatically resized when uploaded to ensure they display properly on different sized screens.
On the Image Library page, you can find any images you have previously uploaded for use in a Custom email. To upload a new image, click the button labelled “Choose File,” find the file you wish to upload on your computer, click “Open” then click Upload. The new image should now appear in the Image Library. Click on this image and click Select.
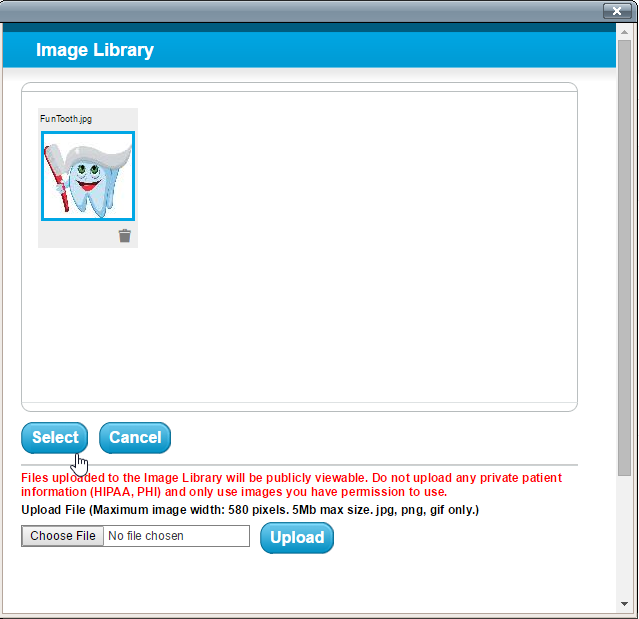
Back on the Insert/Edit Image window, fill in the Image Description and Title fields, and click “Insert.” You should now see your image in the body of your Custom email message.
In the Appearance tab of the Insert/Edit Image window, you can edit additional properties of your image including its dimensions, border, and alignment.
Selecting recipients
When sending your Custom email, you have the ability to choose which recipients will receive it. This can be helpful if, for example, your office will be unexpectedly closed and you need to notify patients with appointments on that date. To start, click the Select Recipients button at the top of the page. This will open a new window whose first option is to choose whether to send to individuals or groups.
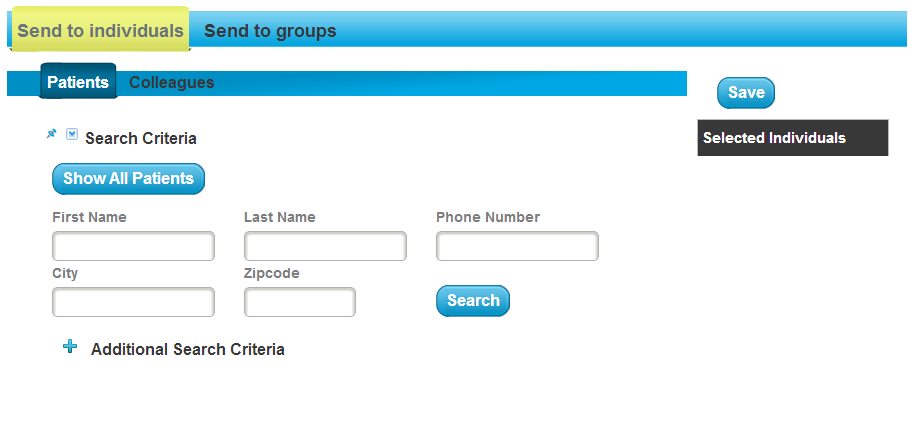
Send to individuals
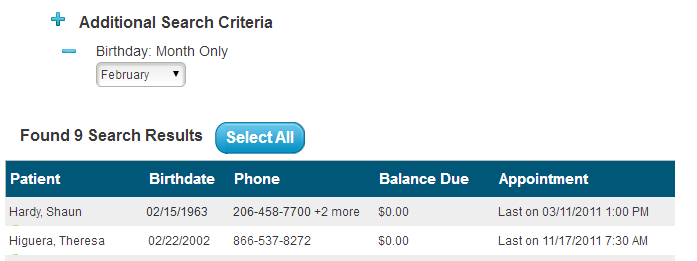
This page contains a searching feature that is similar to the one found on the Advanced Search page in your Member Dashboard. You can search for recipients by standard fields, such as name, city, or phone number; or you can use the Additional Search Criteria to search by other filters such as birthday, appointment date, or balance due. You can also use the Show All Patients button to show a list of all your patients.
When you have selected the search criteria, click the Search button to see a list of the results. The search results will appear below the search criteria fields. From this list you can either click the Select All button to add all of the search results to your recipient list, or you can choose individual patients from the search results by clicking on their names.
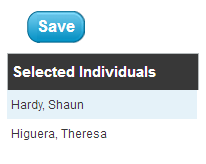
As you select recipients, they will appear in the “Selected Individuals” list on the right side of the window. If you want to remove a recipient, simply click the name in this list and the person will be removed.
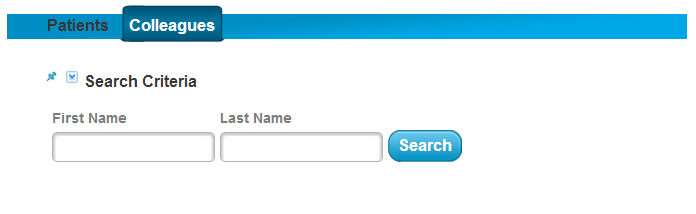
If you would like your Custom email to send to colleagues, click on the Colleagues tab. The search feature for colleagues is more simple, with just a basic First Name and Last Name field. After entering your search criteria, click the Search button to see a list of results. From these results, simply click the name of the colleague you wish to add to the recipient list and that person will appear under “Selected Individuals.”
You can send a Custom email to patients and colleagues at the same time. Simply add recipients from both search pages.
Once you have selected all of your desired recipients, be sure to click the Save button to save the list.
Send to groups
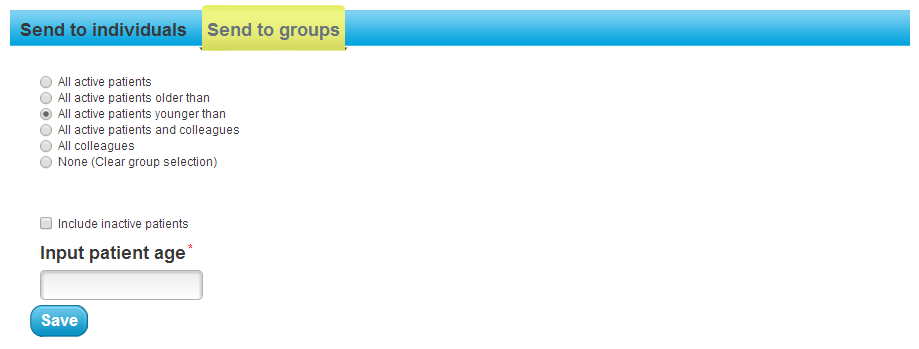
To send your Custom email to a group, click on the “Send to groups” tab at the top of the window. From this page, you will be presented with a list of options. You can choose to send the email to all patients, all colleagues, only active patients, or even patients of certain ages. When you choose to send to patients “older than” or “younger than,” an additional field appears to input the age threshold. Below the list of groups is a check box that allows you to include your inactive patients in the recipient list.
Once you have selected the desired group, be sure to click the Save button to save the recipient list.
 Looking for more information? Check out these Related Pages!
Contact our Member Services team at 866-537-8272, Monday - Friday 6 AM to 4 PM Pacific Time.