Using the Patient Form tab in your General Settings, you can create a health history form so that new patients can submit their health information to you, directly from your website.
Don't see the Patient Form tab? Click here to sign up for one of our Online Health History Form webinars. After completing the webinar, the Patient Form feature will be enabled in your Member Dashboard.
Design
The Design page allows you to customize the form that your patients will use. The Title will be displayed at the top of your form, and the Foreword is a paragraph of introductory text that appears below the title on the form. You can leave the default Foreword, or create your own message to your patients.
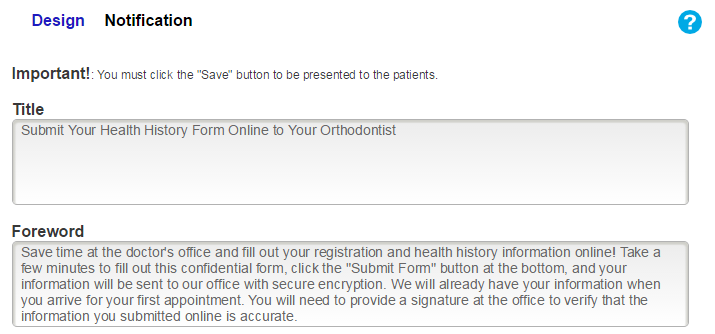
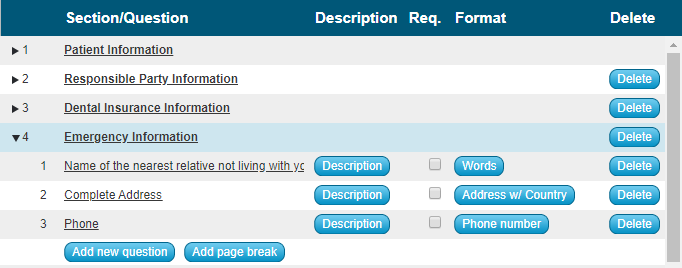
Below the Foreword are the sections and questions that will appear on your form.
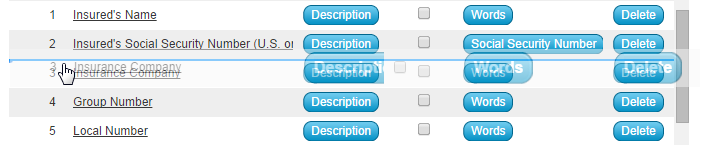
You can expand any section to add or customize questions by clicking on the arrow to the left of the section number. This will show you each question in that section, as well as the options available for those questions.
Adding a new section to your form
- Click on the “Add new section ” button below the Section/Question list. This will create a new section line. Next, click on the text “**new section** ” which will open up a text box where you can type in the new section title. To exit this text window, simply click outside that box, anywhere else on the screen.
- Next, you can click on the arrow to the left of the section to expand that section and start adding questions.

Adding a question to a section
- Scroll down to the bottom of the expanded section and click on the “Add new question” button. This creates a line for your new question. You can click on the text “**new question** ” to open a text box where you can type in the question you want to add. To exit that window simply click outside that box anywhere else on the screen.
- Next, you will want to click on the button “Select a Type” in order to choose an answer type for patients to respond.


Adding a hyperlink
- Click on the “Add new question” button.
- Click on the text “**new question** ” and type in the instruction you would like your patients to see (i.e.: "Please click on the link to view our Privacy Policy before submitting your forms").
- Click on the "Description" button and copy/paste the URL that the hyperlink will direct to.
- Click on the "Select a Type" button and choose "Link" as the response format.
- Click on "Save and Preview" to make sure that the hyperlink directs to the correct place.
Moving a question or section
- You can reorder your Sections, or the Questions within each section, by clicking on the Section/Question number and dragging it to the desired location.
Add Page Break
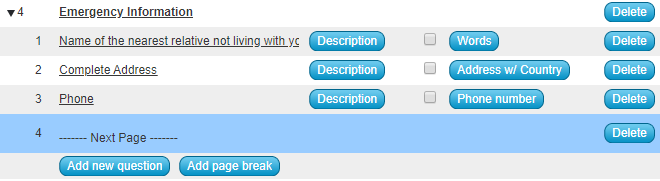
Creating a page break allows you to print the next part of a patient's completed form starting on a new page. By default, when you print Patient Forms, all sections will print together on as few pages as possible. If you would like to add a page break and have the next part of your form start on a new page please follow these steps:
- Go to the bottom of the section preceding the page break
- Click the "Add Page Break" button
- You will see the next Question area noted as ---------Next Page ---------
- You can move the page break to another part of that section if needed
- Anything below the page break will be printed starting on a new page
Required Fields
- If you want to add or remove the required option for a particular question, you will want to find the question and check or uncheck the box “required.” Any questions that have a checkmark will require the patient to answer them in full before submitting the Health History Form.
After your patients have submitted Health History Forms, you can find them in your Member Dashboard on the Patients page under the Health Forms tab. Click the “View” link in the Form column to see the submitted form. You can then either print the form, or save it as a PDF file.
When you are finished with your updates, be sure to click the Save Changes or Save & Preview button.
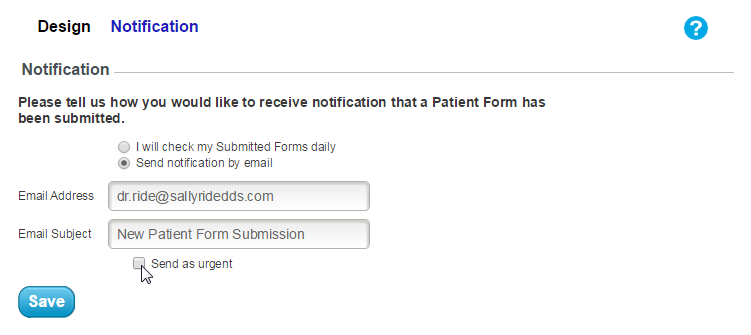
Notification
From the Notification page, you can opt to receive email notifications of new Patient Forms as they are submitted. The Email Address and Email Subject field allow you to configure where the notifications are sent. If your email client supports the feature, you can use the provided check box to have the email sent with an Urgent flag.
You can view submitted Health History Forms on the Health Forms page in your Member Dashboard.
Be sure to click the Save button when you are done with your changes.
 Looking for more information? Check out these Related Pages!
Contact our Member Services team at 866-537-8272, Monday - Friday 6 AM to 4 PM Pacific Time.